Coding
Create Feature Flags For Your React App with Firebase Remote Config
A simple way to switch on and off your application features.
By Fabian Lee | October 02, 2020
5 min read • Loading views

Feature flags (toggles / switches), as the name suggested, are for switching on and off certain features in your application. You can add feature flags to perform A/B testing by switching on beta features for some users. You can use them as a fail-safe switch in case something goes wrong in production. Or you can use them to hide your work-in-progress features.
Here I'm going to show you how to implement features flags with Firebase Remote Config with React.
Getting Started
1. Initialize Firebase
We need to install 2 packages for this demo. If you've already setup Firebase then just install semver, I'll explain what's it for later.
$ yarn add firebase semver
Then, create a file firebase.js to initialize the Firebase instance along with other Firebase services you need, which would be remote-config in our case.
import Firebase from 'firebase/app';
import 'firebase/remote-config';

const firebaseConfig = {};

export const firebase = Firebase.initializeApp(firebaseConfig);
Head over to your Firebase Console and create a new project if you don't have one. Then go to the Project Settings page to get your Firebase SDK configs and paste it into firebase.js.
const firebaseConfig = {
  apiKey: "Your Api Key",
  authDomain: "yourapp.firebaseapp.com",
  databaseURL: "https://yourapp.firebaseio.com",
  projectId: "yourapp",
  storageBucket: "yourapp.appspot.com",
  messagingSenderId: "Some ID",
  appId: "Some ID",
  measurementId: "Some ID"
};
With the firebase instance initialized, we can pass it around and invoke all the available services.
2. Create Remote Flags in Firebase
In your Firebase Console, head to the Remote Config section. You can find it under the Grow section on the left side menu.
You should see the following if it's your first setup. Enter a parameter key which will be our feature flag name and its default value which will be a semantic versioning string ^1.0.0. The string will be related to the semver package that we installed at the beginning. I'll explain it in the next section.
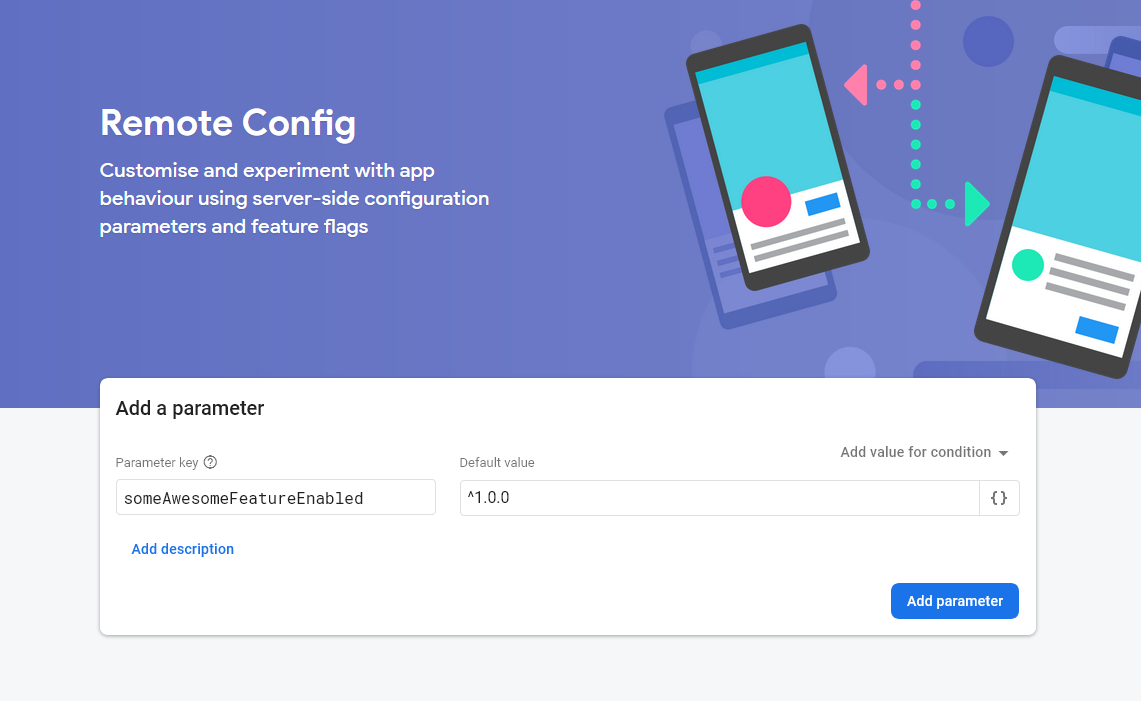
Click Add parameter and you should reach this page.
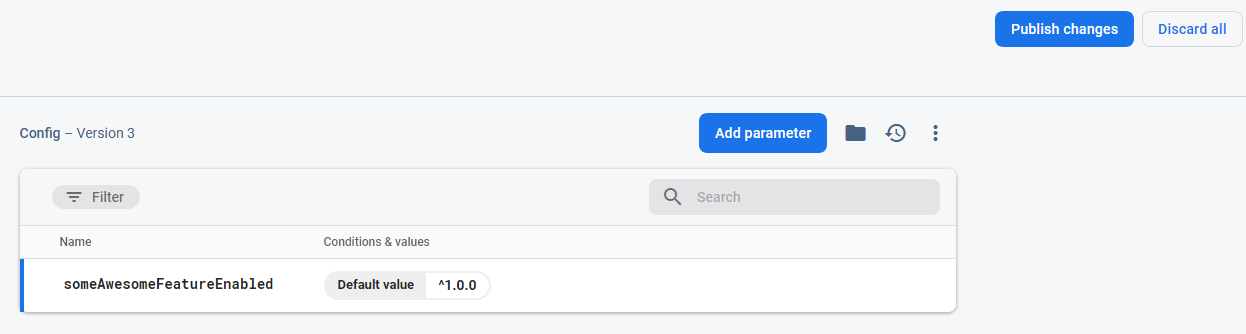
Click Publish changes and you'll have your first feature flag ready to use!
3. Create FlagsProvider Component
In order to share your feature flags across your app, we need to create a FlagsProvider which fetches all the remote flags we created above and share them through the Context API.
First, create a FlagsContext and get the remoteConfig instance. Since all the fetched remote configs will be cached in your browser's IndexDB, we can adjust the maximum age of the cache in development, i.e. minimumFetchIntervalMillis. Obviously, you can also manually delete the cache yourself.
Our provider component should take in a defaults prop for setting the default values of your feature flags. We'll save them in a flags state and pass it to our Provider below, so we can trigger a re-render when we set new flags.
import * as React from 'react';
import semverSatisfies from 'semver/functions/satisfies';
import { firebase } from './firebase';

const FlagsContext = React.createContext({});
const remoteConfig = firebase.remoteConfig();

// For development only
remoteConfig.settings = {
  minimumFetchIntervalMillis: 3600000,
};

const FlagsProvider = ({ defaults, children }) => {
  const [flags, setFlags] = React.useState(defaults);

  // Next Part

  return (
    <FlagsContext.Provider value={flags}>{children}</FlagsContext.Provider>
  );
};

export default FlagsProvider;
Next, we'll add an useEffect hook. We need to assign our defaults prop as the default config. Then we fetch and activate all the remote flags. We would then loop through the remote flags and set our flags state.
const FlagsProvider = ({ defaults, children }) => {
  // ...
  React.useEffect(() => {
    remoteConfig.defaultConfig = defaults;
    remoteConfig
     .fetchAndActivate()
     .then(activated => {
        if (!activated) console.log('not activated');
        return remoteConfig.getAll();
     })
     .then(remoteFlags => {
       const newFlags = {
         ...flags,
       };
       for (const [key, config] of Object.entries(remoteFlags)) {
         const appVer = process.env.REACT_APP_VERSION;
         newFlags[key] =
            semverSatisfies(appVer, config.asString());
       }
       setFlags(newFlags);
    })
    .catch(error => console.error(error));
  }, []);
  // ...
};
Here's where semver helps us determine the boolean state of a flag. The semverSatisfies function checks if a given version number satisfies a versioning range.
To illustrate how it works,
- We would retrieve our app version from our environment variables.
Simply add
REACT_APP_VERSION=$npm_package_versionto your.envfile in this example which would retrieve the version number from yourpackage.json.
-
We have 1 remote flag which is
['someAwesomeFeatureEnabled', '^1.0.0']. -
Assuming our app version is 1.0.1 ,
semverSatisfies('1.0.1', '^1.0.0')would return true. -
And finally we call
setFlags({ someAwesomeFeatureEnabled: true }).
4. Wrap your App with FlagsProvider
import * as React from 'react';
import FlagsProvider from '...';

const App = () => {
  return (
    <FlagsProvider
      defaults={{
        someAwesomeFeatureEnabled: false,
      }}
    >
      <App />
    </FlagsProvider>
  );
};
Finally, wrap the FlagsProvider to your root App and specify the defaults prop. The flag names MUST match the ones you set in your Firebase Console. Or else it won't be able to fetch the corresponding flags.
How to Access your Flags
To make your life easier, you can create a custom hook for retrieving your flags from your FlagsContext.
export const useFlags = () => {
  const context = React.useContext(FlagsContext);
  return context;
};
You can now toggle your awesome feature like this 👏,
const Component = () => {
  const { someAwesomeFeatureEnabled } = useFlags();
  return <div>{someAwesomeFeatureEnabled && <SomeAwesomeFeature />}</div>;
};
All Done!
It's such a development changing experience for me. I can keep working on new features and once they're ready, I can simply switch on the flag instead of redeploying the app.
If you want to add more flags, simply add them to Firebase and the defaults prop. And remember to update your app version every time your deploying a new version!
Remote Config can also be done in React Native as well. The APIs will be slightly different but the concept is the same. Check out React Native Firebase here.
Also, you have a lot of flexibility in specifying the versioning range, check out the docs here.
Until next time, hope you'll find this demo useful.😄
Thanks For Reading 😉
If you would like to show your further support: